Create Azure Apps
2 minute read
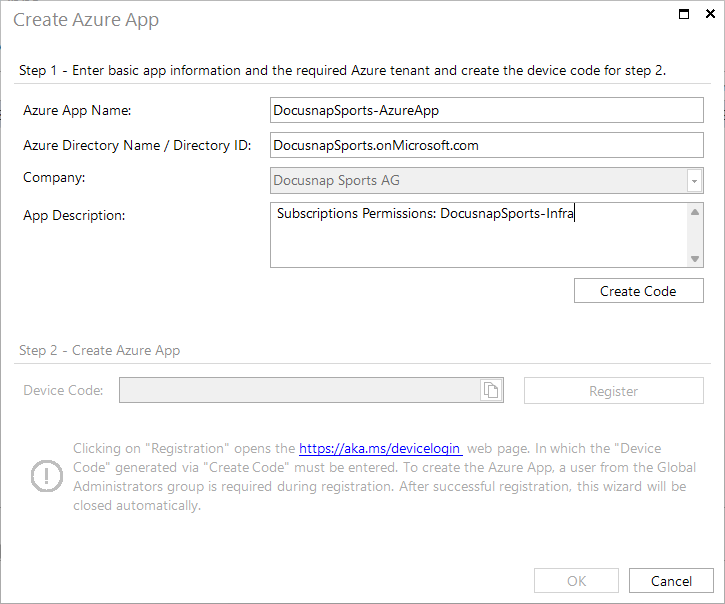
Clicking the Create New App button opens a dialog. As Azure App Name Docusnap is suggested. This name can be customized as desired, but it must be ensured that the name is unique in the Azure environment. In the next text box, either the Azure directory name or the directory ID can be specified. If the dialog was opened as part of the inventory wizard, then the company that was selected in the wizard will be selected by default. If the dialog is opened in the administration, the company can be selected. Optionally a description can be added, for example which subscriptions belong to this app.
A device code is then generated by clicking on Create code.
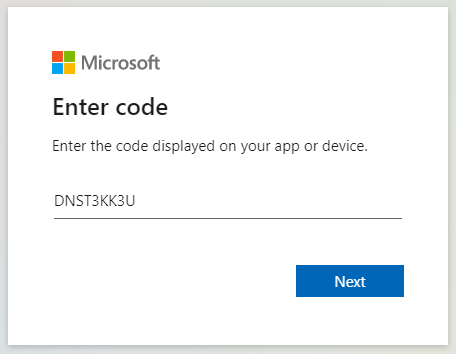
Mit einem Klick auf Registrierung durchführen wird die Webseite geöffnet, in der der Gerätecode eingegeben werden muss. Nach dem Öffnen befindet sich der Gerätecode bereits in der Zwischenablage und kann mit Strg+V eingefügt werden. Anschließend bitte mit einem Benutzer mit der Rolle “Globaler Administrator” anmelden.
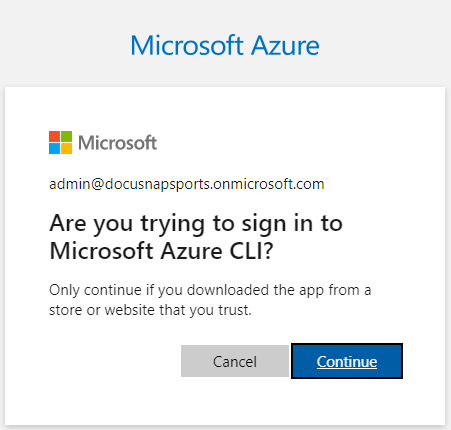
Once the Microsoft Azure CLI is confirmed, the Azure App is created. The browser can be closed. The dialog for creating the app is closed as soon as the app is available.
Azure Inventory
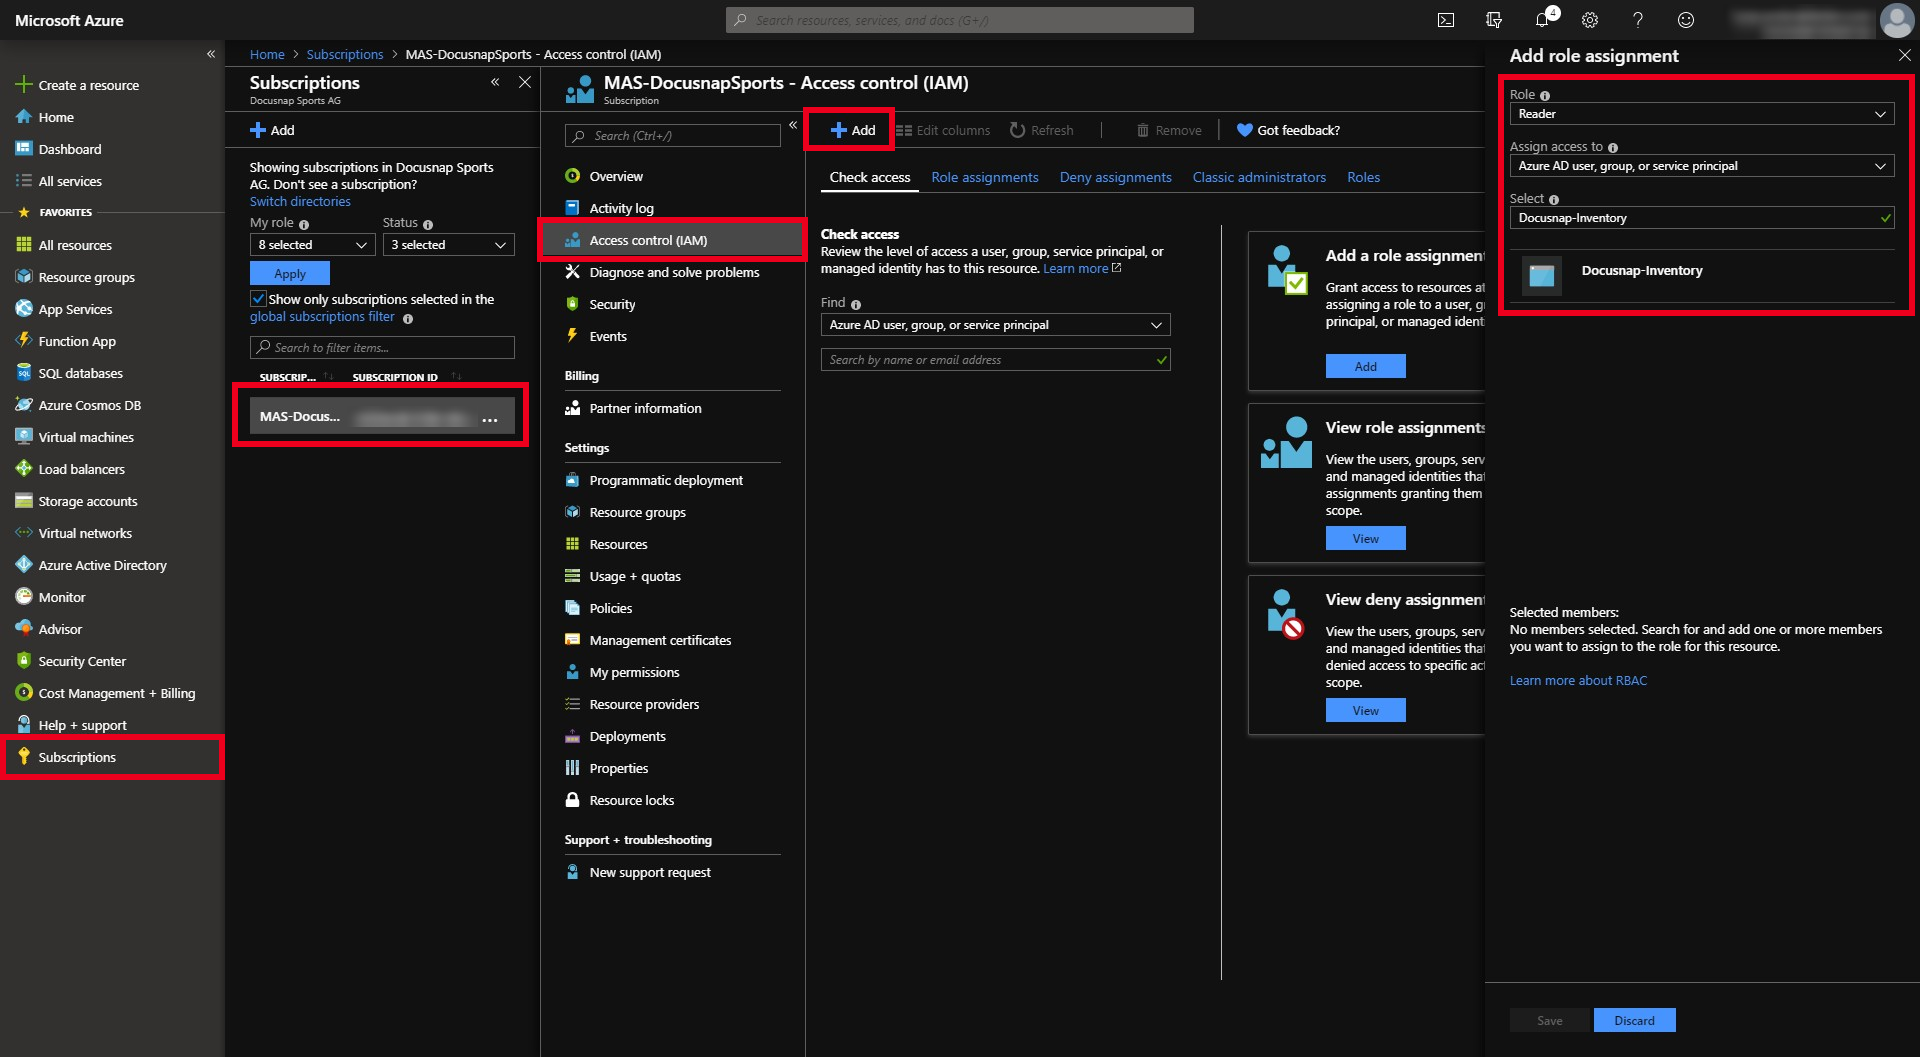
The following instructions describe the optional configuration step that must be performed in Azure Administration to grant the app read access to the desired subscriptions. This step is only required if the created app should be used for the Azure inventory.
In the resource overview or the search, select the Subscriptions option.
- Select the relevant subscription.
- In the subscription selection, click Access control (IAM).
- Select Add and then Role Assignment.
- In the role selection, select the “Reader” role.
- In the Select field, enter the name of the app.
- Select the desired app, which will then be displayed under Selected Members.
- Confirm the assignment by clicking Save.
The steps must be repeated for each subscription to be inventoried with Docusnap.